Synchronize
1 Overview
smartChord Synchronize keeps the contents of your Android devices in sync via your personal cloud storage. Once configured, you can edit your songs, set lists, exercises, and favorite fingerings on one device and have everything ready on the next — no manual export or copy required.
Set up your cloud first — see the Cloud section.

The Synchronize hub — pick your cloud, log in, then sync
2 What Can Be Synchronized
The database synchronization covers virtually every piece of content you create in smartChord:
3 How Synchronization Works
The principle is straightforward and stays out of your way:
- Start the synchronization on device A and log in to your cloud.
- smartChord checks your cloud. If no sync data is there yet, it uploads device A’s content into
/smartChord/sync. - Start the synchronization on device B and log in to the same cloud account.
- smartChord finds the cloud data, compares both sides, and shows you the difference.
- You verify the difference and confirm the synchronization.
- smartChord merges the data and uploads the new result back to the cloud for the next device.
Comparisons are based on the last-changed timestamp of each item, with a one-minute tolerance to absorb small clock differences between devices.
4 Setting Up the Cloud
Before your first synchronization you need to connect smartChord to your cloud. Open the Synchronize tool from the home screen or the main menu.
4.1 Open Synchronize
Tap Synchronize on the toolbox home screen, or open the Navigation menu and pick Synchronize from the list.

Toolbox home — tap Synchronize to begin

Navigation menu — Synchronize is also available here
4.2 Choose Your Cloud and Log In
The first time you use a tool that requires cloud access, the cloud screen opens automatically. Here you can choose between Google Drive, Dropbox, and NextCloud.
- Pick the cloud provider you want to use.
- Tap Login. Depending on the provider you’ll either enter your username and password, or sign in with an existing account.
- The first time, you’ll be asked to grant smartChord permission to access your data — only with your consent can smartChord read from and write to your cloud.
- After a successful login the Login button turns into a Logout button. Tap it any time to revoke smartChord’s access.
For the full reference, see Cloud access.
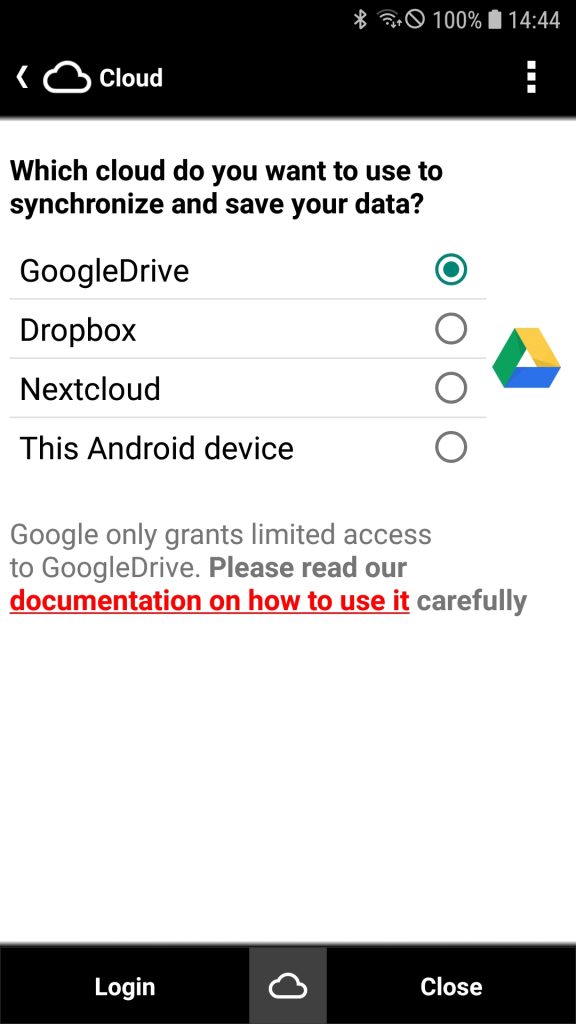
Pick Google Drive, Dropbox, or NextCloud, then Login

Choose the account to use with smartChord
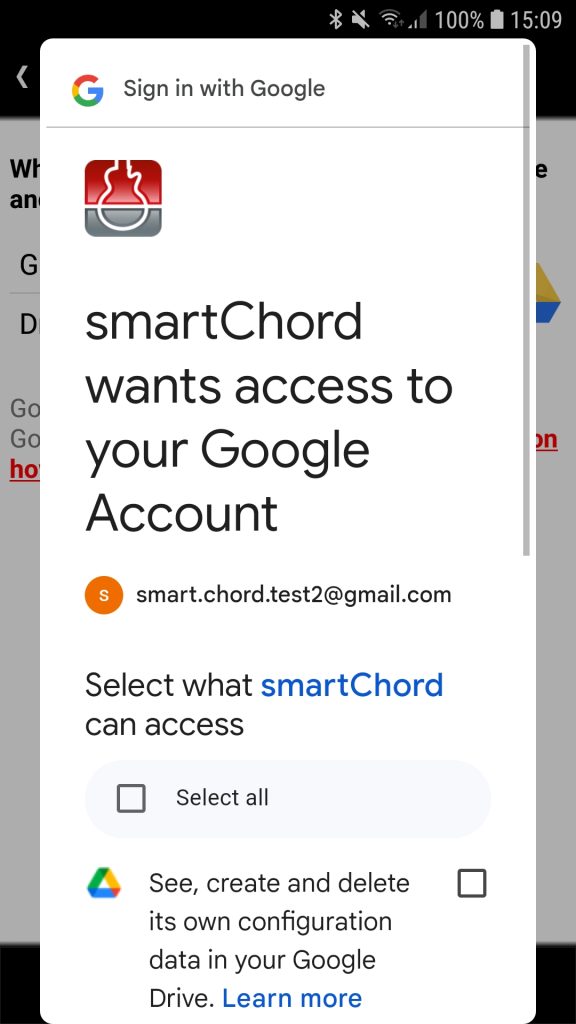
Grant smartChord permission to access your cloud

Logged in — the Login button is now Logout
backup, setlists, songs, sync) is needed. Existing Google Drive users may also need to migrate to the “New Google Drive Access”. The full step-by-step is in Cloud access → Prepare the cloud for use.
5 Database vs. File Synchronization
After tapping Synchronize, smartChord asks which kind of synchronization you want to run. Pick the option that matches what you are trying to do.
5.1 smartChord (Database Synchronization)
- Synchronizes all entries from your smartChord storage (songs, set lists, exercises, favorite fingerings, custom chords, and more).
- Best for keeping your own Android devices — phone and tablet — in lockstep.
- Deleting an item is carried over to your other devices, because the database remembers that an entry was deleted.
- Default cloud folder:
/smartChord/sync.
5.2 Songs / Set list (File Synchronization)
- Stores songs and set lists as editable text files in a cloud folder you choose.
- Songs are saved as
.sccrd, set lists as.scstl, both in UTF-8. - Best for sharing content with band mates or friends, or for editing on a desktop computer.
- File contents are not compared — the timestamp decides which side wins.
- You decide in each direction what may happen, see File Synchronization in Detail.
Choose between full database sync (devices) or file sync (songs, set lists)
6 The First Synchronization (Device A)
On the very first run there is nothing in the cloud yet. smartChord uploads the content of this device so that other devices can pick it up later.
6.1 Preparation Checks
After tapping Synchronize, smartChord runs a quick preparation. It verifies that:
- A time server is reachable — accurate time is essential for the timestamp comparison.
- The folder in the cloud exists (and is created if needed).
- No other device is currently synchronizing (parallel sync is not allowed).
- There is content available to synchronize.
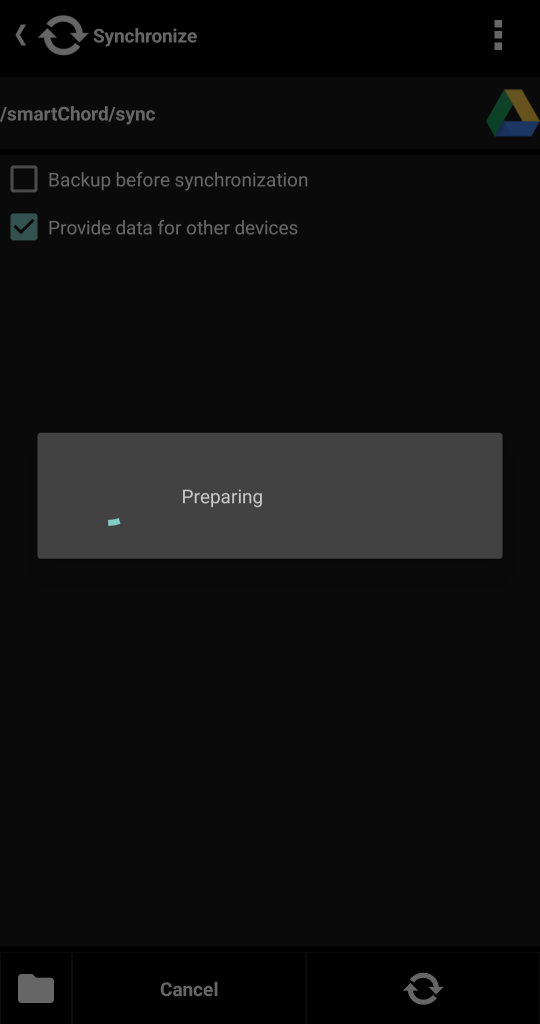
Preflight: time server, folder, parallel sync, content

First time: nothing to compare against yet
6.2 Finish the First Sync
Tap Close to finish. smartChord uploads its content into the cloud and runs a cleanup. Afterwards a fresh sync database file lives in your cloud folder, ready for the next device.
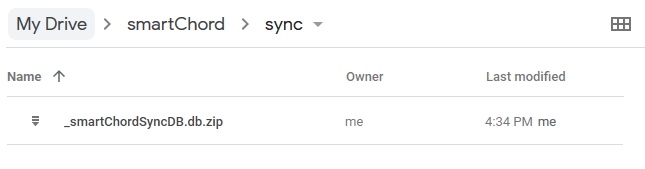
A new file in your cloud: _smartChordSyncDB.db.zip
7 Synchronizing the Second Device
Switch to your second device, open Synchronize, log in to the same cloud account, and start the sync. This time smartChord finds the data uploaded earlier and compares it with what’s on the device.
7.1 Backup and Compare
Before the comparison runs, you can enable Backup before synchronization — a safety net that lets you roll back if something looks wrong afterwards. Then tap Compare.

Tick “Backup before synchronization”, then tap Compare
7.2 Review the Differences
smartChord groups the differences by item type (Pattern, Song, Set list, …) and by action (create, update, delete). For each entry you see whether the change comes from the cloud or from this device, plus the timestamp.
- Items of the same type are grouped together.
- Items of the same action (new, changed, deleted) are also grouped.
- Synchronization detects new, changed, and deleted items.
- Relevant for the comparison is the timestamp of the last change.
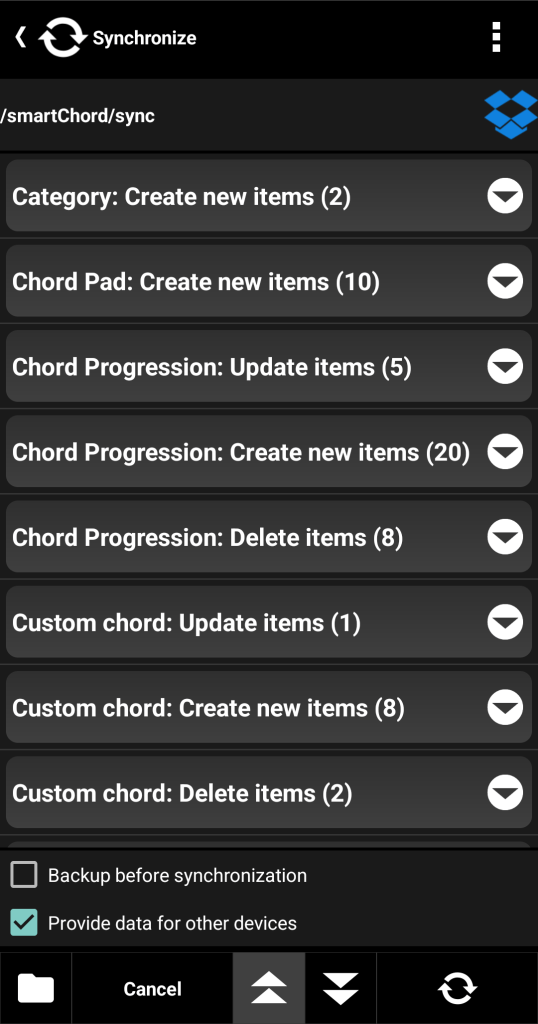
Difference view: grouped, with cloud / device timestamps

Tap Synchronize to apply the changes
8 Uploading the Merged Result
After the sync runs, this device is up to date. To share its merged state with your other devices, tap Upload. smartChord pushes the new combined data back into the cloud, ready to be picked up by your next device.

Tap Upload to provide the synced data for your other devices

Uploading — this device’s content is now in sync and its content is then in the cloud
9 File Synchronization in Detail
File synchronization is the right pick when you want to share songs and set lists with bandmates, or edit them in a text editor on your desktop. smartChord stores them as plain UTF-8 text files in the cloud folder you choose.
9.1 Workflow
- Open Synchronize, log in, and pick Set list or Songs.
- Choose the cloud folder to use.
- Tap Compare and review the entries.
- Confirm to start the sync — smartChord writes
.sccrd(songs) and.scstl(set lists) files. - Repeat on every other device that should receive the same content.
9.2 The Five Options
Above the Compare button you decide what this run is allowed to do. Each option covers one direction and one kind of change, and only what is ticked ever happens. The wording follows what you are syncing, so it reads “Songs” in the songbook and “Set lists” in the set list.
- Create file from Songs (on by default) — a song that exists in the app but not in the cloud is written into the cloud. This is how new songs get published.
- Create Songs from file (on by default) — a file that exists in the cloud but not in the app is imported. This is how you receive new songs.
- Update file if Songs is newer (on by default) — your edit overwrites the file in the cloud.
- Update Songs if file is newer (on by default) — the file in the cloud overwrites your song.
- Delete files: Songs (off by default) — a song you deleted in the app also removes its file from the cloud. Off by default so that a shared folder cannot lose content by accident.
Think of the first four as two pairs: the “file” ones write to the cloud, the “Songs” ones write to your device. Switch off a whole direction and the synchronization becomes one-way.

Every run does only what you tick here
9.3 Recipes
Five settings sound like a lot, but in practice you use two or three fixed combinations. Pick the one that matches what you are doing.
Remove a song from every device
You are thinning out your songbook, and the song should be gone everywhere.
- On device 1, delete the song and synchronize with Delete files switched on. The file disappears from the cloud.
- On device 2, switch Create file from Songs off before you synchronize. Otherwise device 2 puts the song straight back into the cloud.
- On device 2, delete the song as well. Nothing travels back into the cloud.
- Switch Create file from Songs on again for your normal runs.
The song has to go on each device, because the file synchronization never deletes a song on your device, only files in the cloud. Step 2 is what keeps the cloud clean while you work through your devices. If you want deletions to travel by themselves, use the database synchronization instead.
Publish for the band, take nothing back
You keep the songs, everyone else reads them. Your device writes, it never accepts anything.
- On: Create file from Songs, Update file if Songs is newer
- Off: Create Songs from file, Update Songs if file is newer
- Delete files: on if the band should lose a song when you drop it, off if not
Follow the band leader
Someone else maintains the songs and you want their version, without ever pushing your own edits into the shared folder.
- On: Create Songs from file, Update Songs if file is newer
- Off: Create file from Songs, Update file if Songs is newer, Delete files
With this combination your own notes in a song are overwritten whenever the leader changes it. If you want to keep your version of a particular song, give it a different name, then it is a song of its own.
Edit on the computer
You write and correct your songs in a text editor on the desktop and want the result on the device.
- All four create and update options on, so both sides stay current.
- Save the file in UTF-8, other encodings are skipped.
- Keep the file name, it is what identifies the song. Renaming the file creates a second song rather than renaming the existing one.
Hand a songbook to a new device
The new device should get everything and contribute nothing yet.
- On the new device, first run with only Create Songs from file on.
- Check the result, then switch the other options on for normal two-way runs.
9.4 Things to Know
- Files and entries are matched by name; identical names are treated as the same item.
- File contents are not compared — the timestamp decides which side wins.
- Time comparisons run with a one-minute tolerance.
- Last-modified attributes are updated to the synchronization date and time.
- Only UTF-8 compatible files are synchronized.
- Songs deleted in the app remain in the cloud unless Delete files is switched on or you remove them yourself.
- A song deleted in the app is never deleted on your other devices, see the recipe above.
- Sharing a cloud folder with band mates protects collaborative content from accidental deletions.
10 Best Practices and Troubleshooting
- Always enable “Backup before synchronization” — restoring a backup is much easier than untangling a bad merge.
- Don’t sync two devices at the same time. smartChord blocks parallel synchronization, but you’ll save yourself the retry by serializing the runs.
- Keep device clocks accurate. Synchronization compares timestamps, so a device with a wrong clock can produce surprising “winners”.
- Check the options before a run that is not routine. They are remembered from your last run, so a one-off setting like “Delete files” is still active the next time.
- Deleting is the one thing file synchronization does not spread. If you delete a lot, the database synchronization saves you the walk from device to device.
- Use a dedicated Google account if you’d rather not grant smartChord access to your main Drive.
- Login problems? Try Chrome first; if that fails, fall back to another browser.
- Settings won’t move. Settings are device-specific by design — use Backup and restore if you really need to clone them.
Our video describes the database synchronization in detail:
