How to use
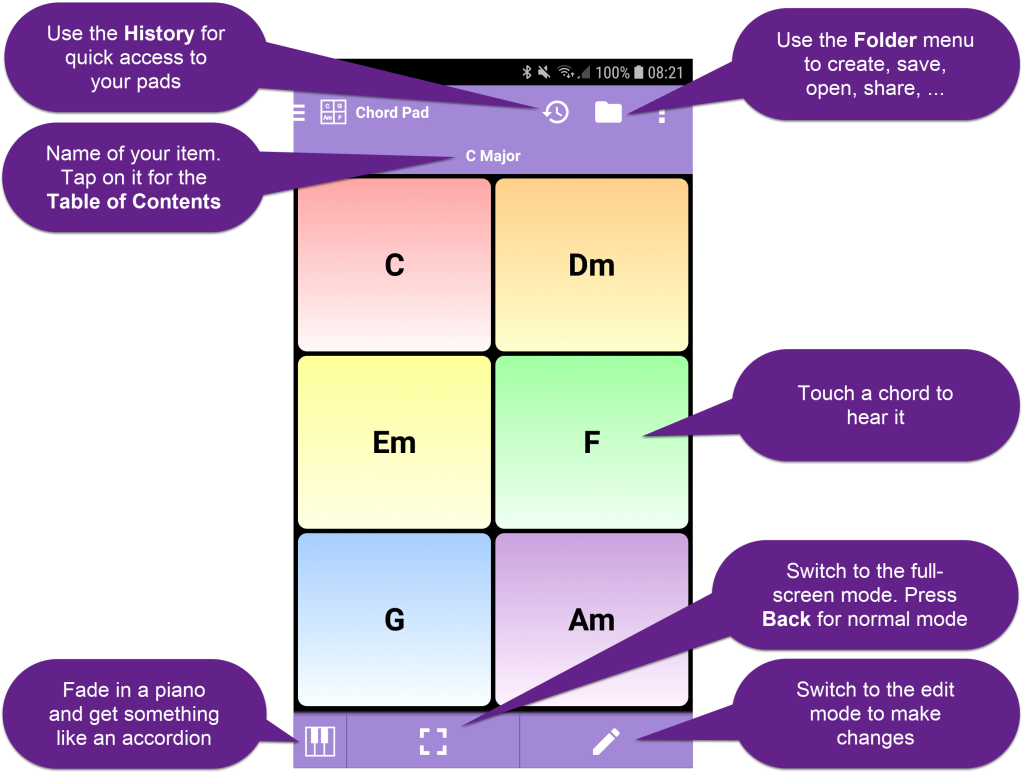
- Use the ‘Folder‘ menu to create, save, open, rename, share, … your chord pads. It also leads you to the table of contents or your chord pads
- Use the ‘History‘ for quick access to your chord pads. They are sorted in the order of their use. Recently saved items appear at the top of the list. But the list is searchable, so you can access any chord pad
- The name of your chord pad is displayed below the title bar. Tap on it to open the table of contents with your chord pads
- Touch the area of a chord to hear it. You can touch several chords at the same time
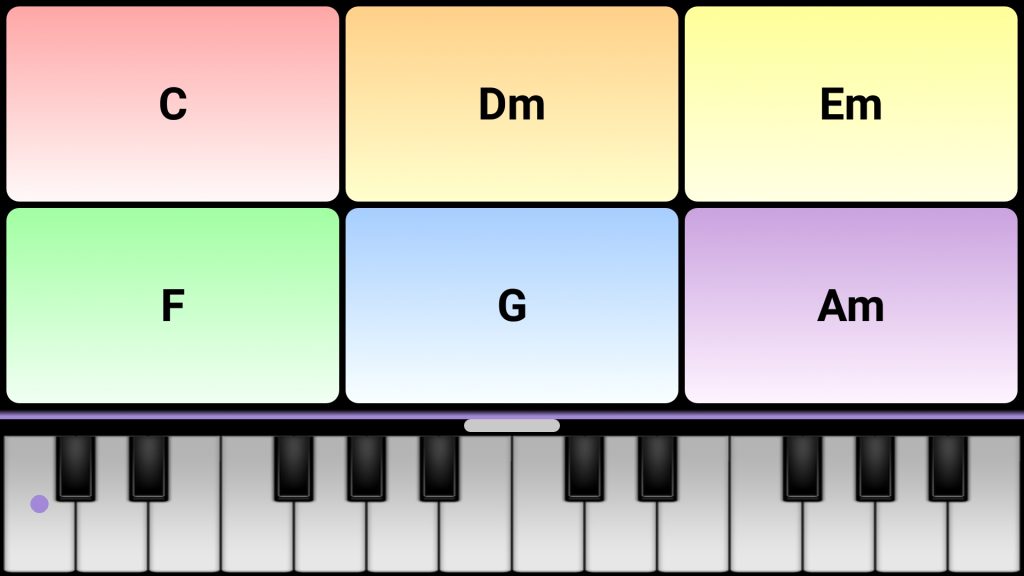
- There is an optional piano or fretboard to play melodies. Together with the piano, the result is something like an accordion 😉
- There is a full-screen mode that displays the chords in maximum size. This makes the Chord Pad easier to use on small screens. Press Back to exit the full-screen mode.
- Switch to edit mode to edit a chord pad
Create a chord pad
Use the Folder menu, to create a new pad. The new pad is empty and the edit mode is active. First, add the chords to the pad with the ‘+’ button in the toolbar. The menu allows to add …
- a chord from the chords tools
- a chord set from a chord progression. This option is available if you already have chord progressions
- a chord set from a song. This option is available if you already have songs
- a chord set from a chord progression of a song. This option uses the Song Analyzer to select a chord progression from a song
Edit a chord pad
Change positions
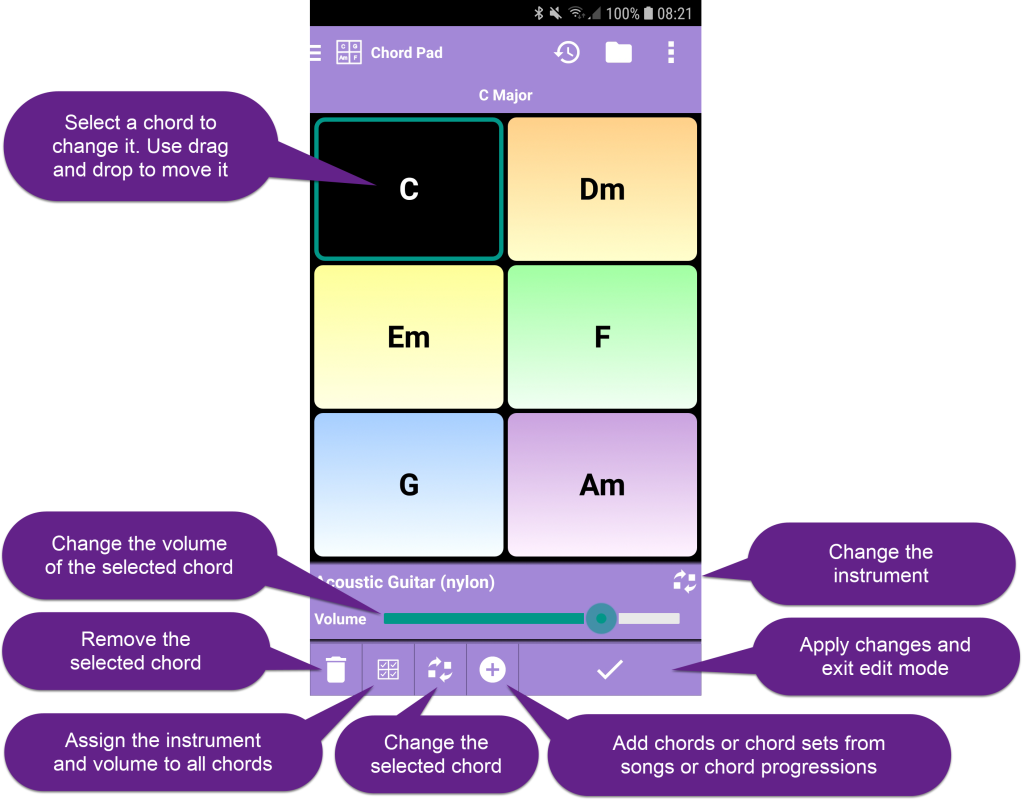
You can easily rearrange and change the position of a chord by dragging it and dropping it at the new position.
Change instrument
Select the chord and use the Replace button beneath the instrument name, to choose from 100 instruments for a different sound. Each chord can have a different instrument sound.
You can assign the visible instrument and the volume to all chords at once with the Replace all button.
Change volume
Select the chord and use the volume slider to choose the volume for the chord. Each chord can have a different volume.
You can assign the visible instrument and the volume to all chords at once with the Replace all button.
Remove a chord
Select the chord and use the Delete button to remove the chord. Removing the last chord is impossible, but you can change it.
Change a chord
Select the chord and use the Replace chord button to assign a new chord to it. Note that the color of the chord is set according to your color scheme.
Transpose the pad
You can use the menu to transpose the whole pad up or down.
Sort the pad
You can use the menu to sort the chords of the pad.
Remove duplicate chords
You can use the menu to remove duplicate chords from the pad.
Apply changes
Apply your changes with the Checkmark button. This will also exit edit mode.
Use your device’s Back button if you want to discard your changes.


Miscellaneous
You can …
- synchronize your pads between your devices
- maintain a notepad with notes for any of your pads
- add links to a pad in the Songbooks or Notepads editor so that you can open it from there with a simple click
- open the Chord Pad tool with the chords of
- a song from the Songbook
- a chord progression,
- Circle of Fifths,
- Song Writer